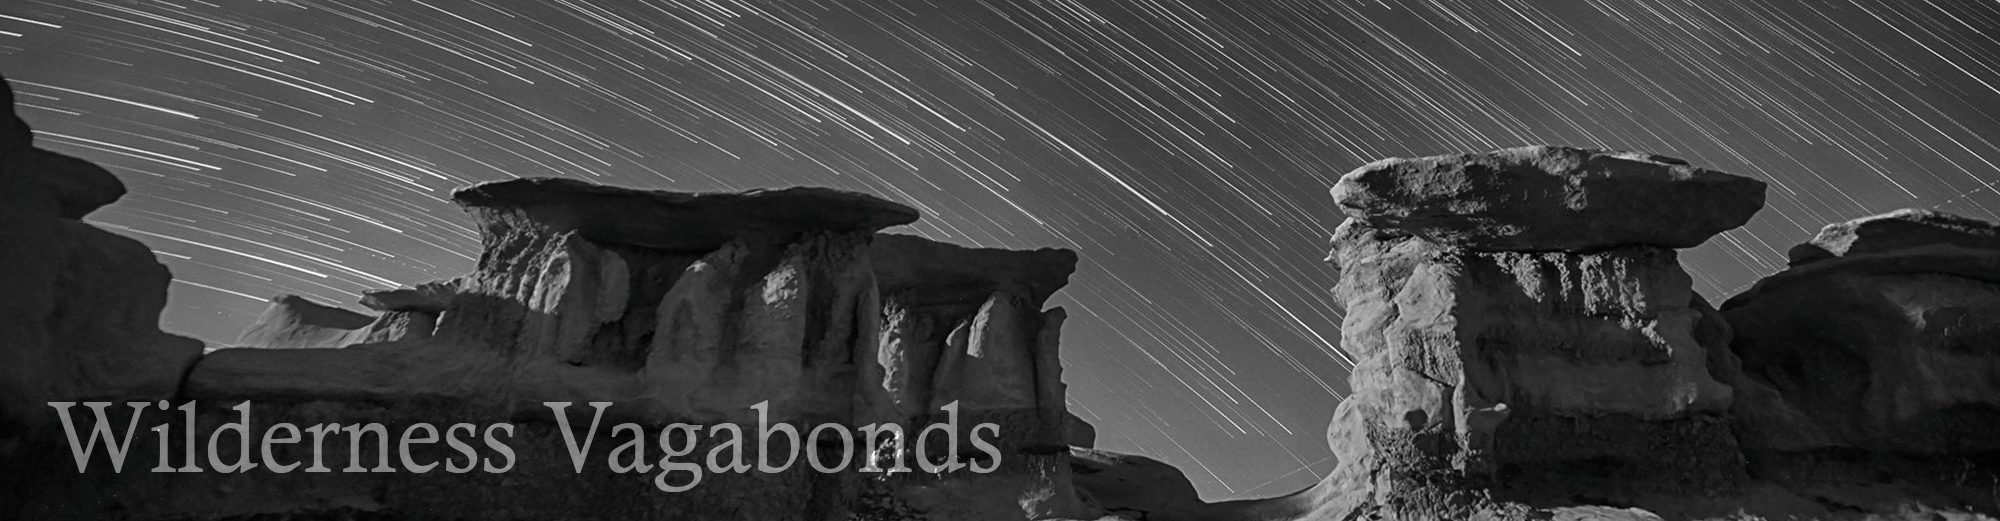
For this tutorial I’m not going to explain StarStaX. It is possible to mandalify any image. I just happen to use star stack images for this often. The creator of StarStax provides a tutorial on his website if you want to try it out. Instead for this tutorial I will focus on mirroring and stacking images in GIMP. This is not the only way to create these images, but it works for me.
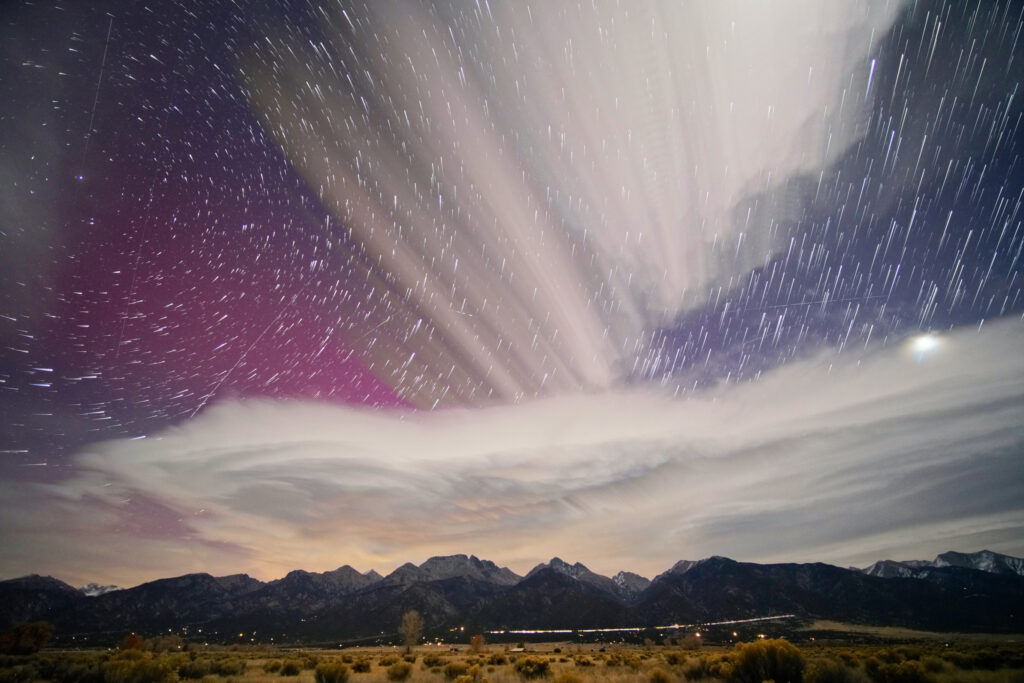
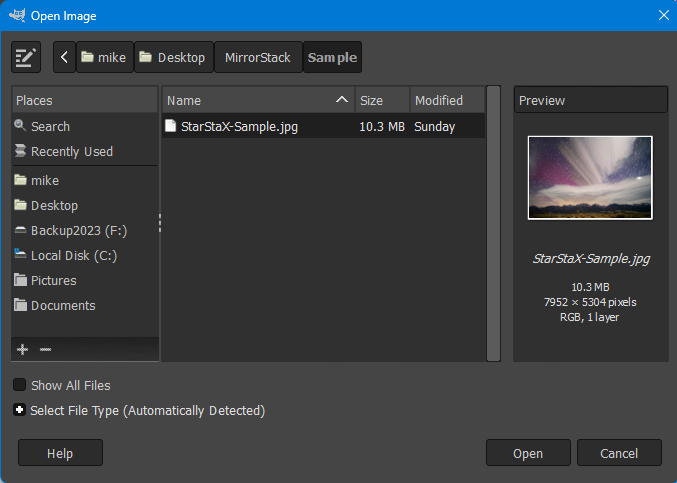
Here’s the star trail image I used as the seed for making the digital mandala, followed by step-by-step instructions.
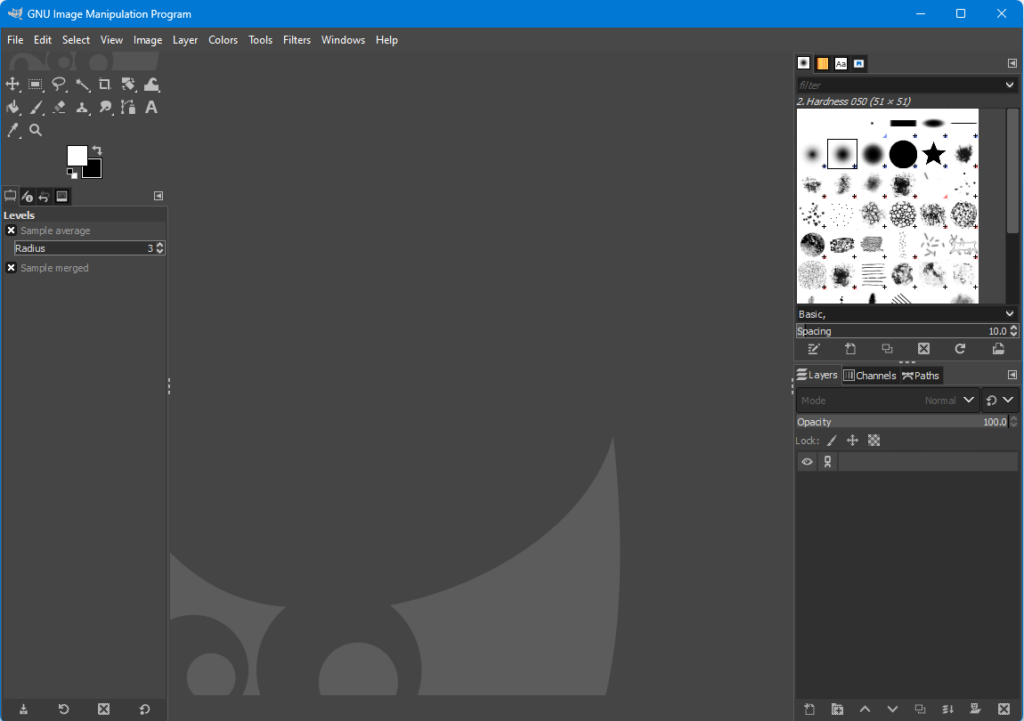
Step 1: Download GIMP, the GNU Image Manipulation Program, from gimp.org and install it. There are versions for Windows, MAC and Linux available. Launch GIMP once it is installed. You should see a window like this when it loads:
Step 2: Use File -> Open to select the image you want to work with.
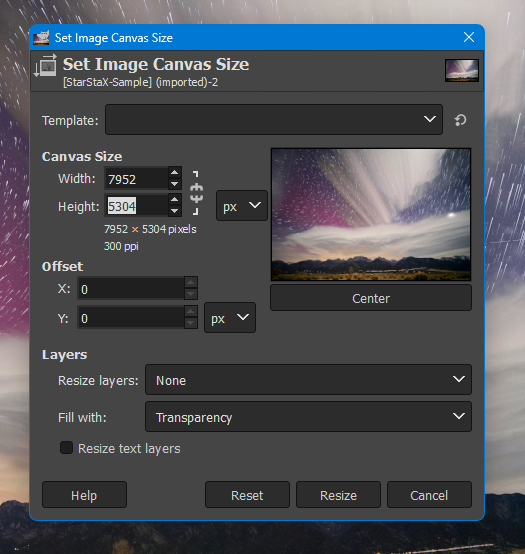
Step 3: Go to Image -> Canvas Size to open a dialog box that displays width and height. You’re going to double one dimension in the dialog box this command opens. I typically pick the smaller dimension, in this case Height which is 5304 pixels. Multiply that number by 2 and then change the value in the dialog box. Click the “Resize” button.
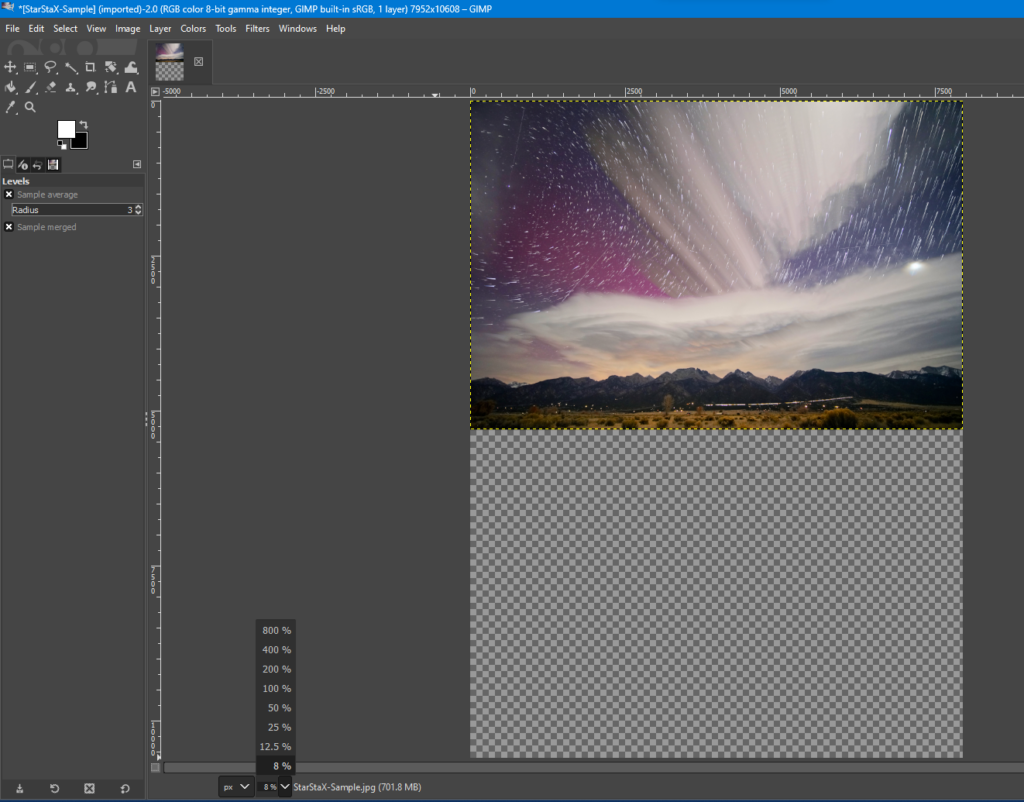
Step 4: In the main window find the control at the very bottom that shows the % of scale for the image you are viewing. You’ll want to see the entire canvas which may no longer be visible depending on the size of your monitor. By default my image opened in GIMP scaled to 12.5% of actual size. That’s the smallest preset offered but I can manually type any number into the field. 8% is about right.
Step 5: Do Select -> All and then Edit -> Copy
Step 6: Do Image -> Transform -> Flip Vertically (if you chose to double height) or Image -> Transform -> Flip Horizontally (if you chose to double width).
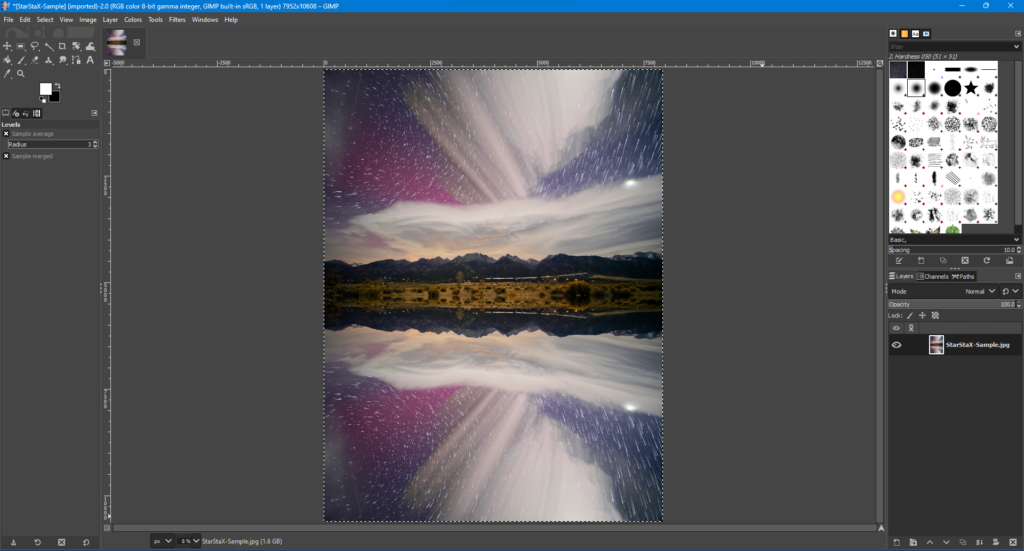
Step 7: Do Edit -> Paste As -> New Layer in Place and then Image -> Flatten Image. It should look like this now:
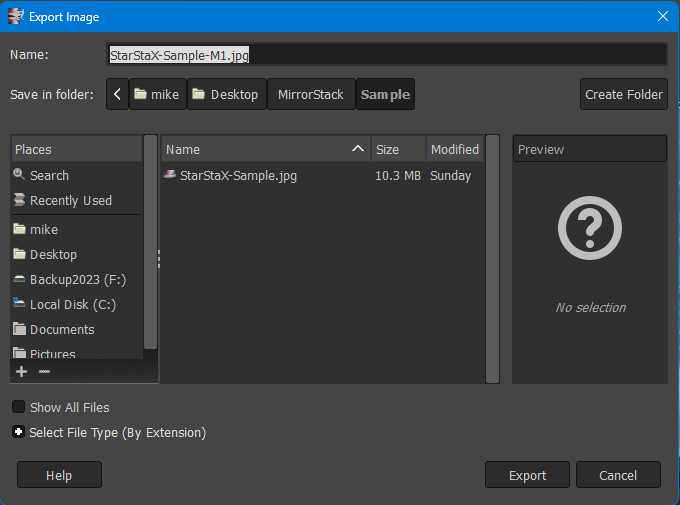
If you want to save a copy at this stage you can do File -> Export As and give it a new name. I often append -M1, -M2 etc to my filenames to indicate these are mirror generation 1, generation 2 etc.
Step 8: Do Image -> Transform -> Rotate 90 clockwise. You may need to scale the view down again depending on the size of your monitor. Just use the same input box (%) at the bottom of the window that you used in Step 4.
Step 9: Repeat Step 3: Go to Image -> Canvas Size. Because of the rotation in the last step the smaller dimension is once again Height.
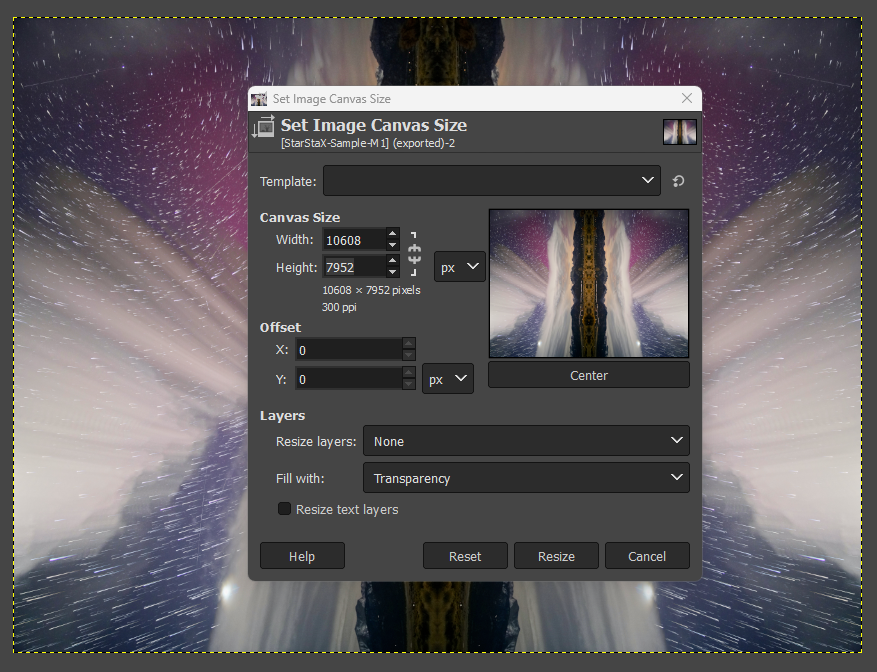
Double it as before and press the Resize button. Now back in the main window you will probably want to scale down the image view using the % box at the bottom of the window.

Step 10: Repeat steps 5, 6, 7 and 8:
- Select -> All
- Edit -> Copy
- Image -> Transform -> Flip Vertically
- Edit -> Paste As -> New Layer in Place
- Image -> Flatten Image
- Image -> Transform -> Rotate 90 clockwise
- File -> Export As and give it a new name (-m2.jpg)
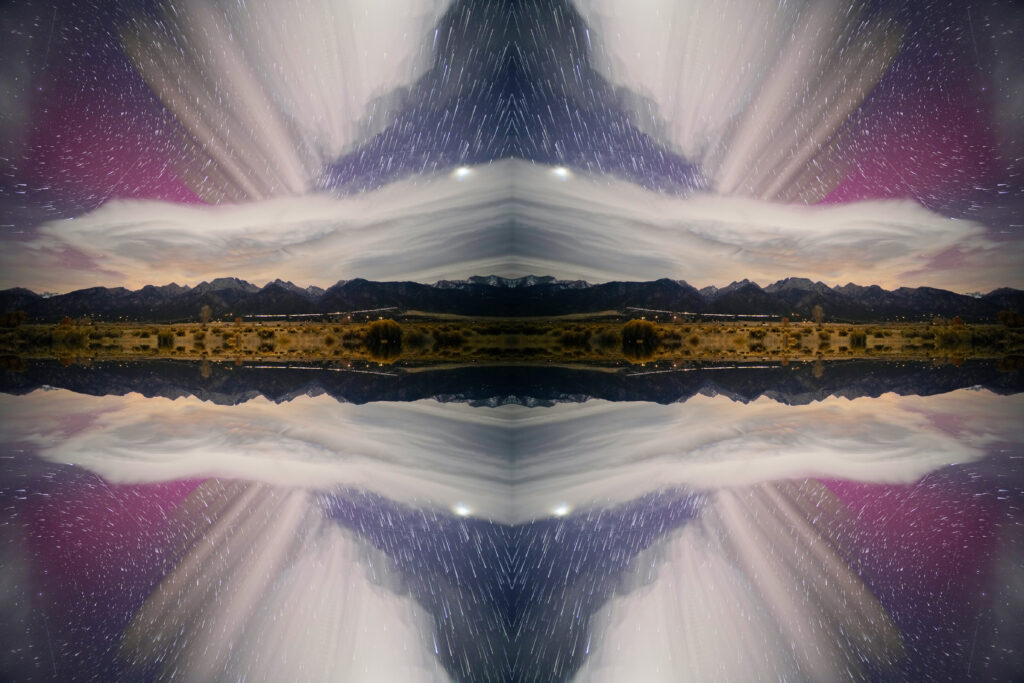
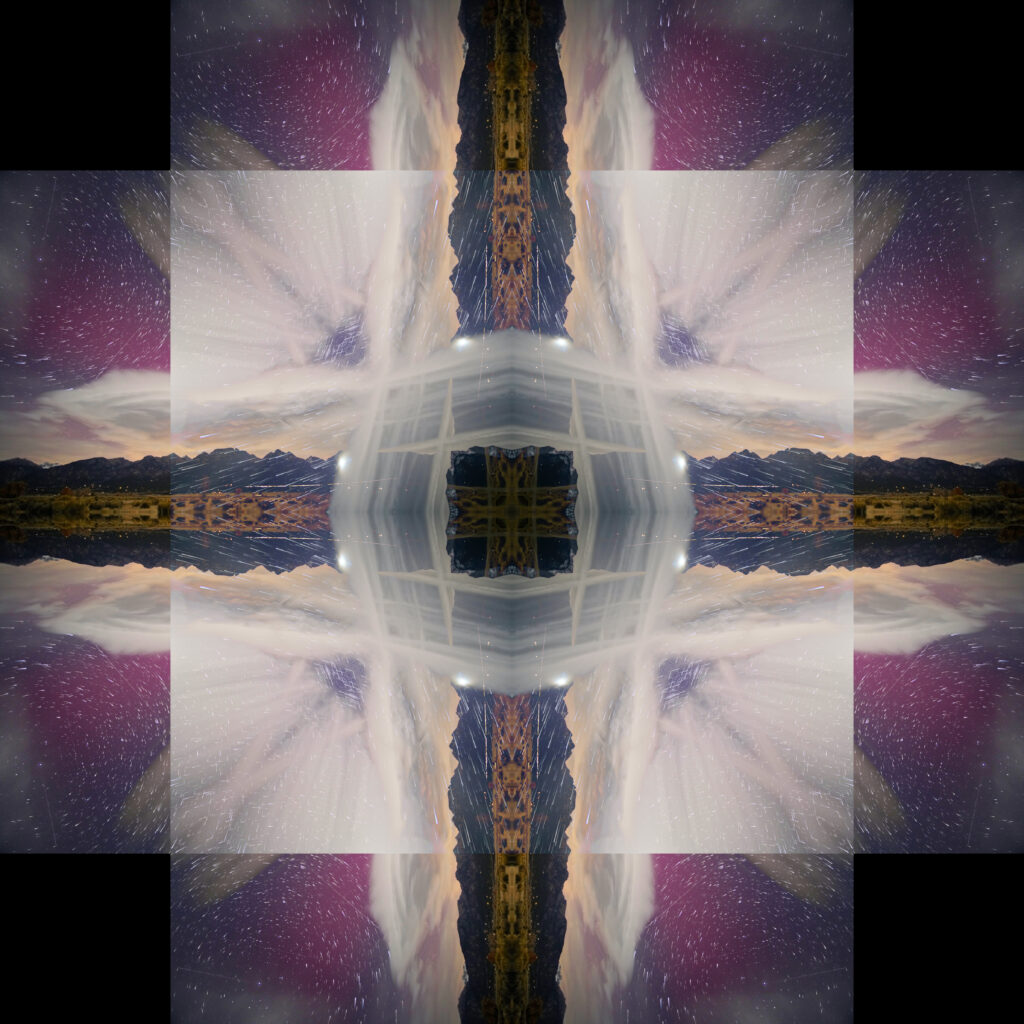
This is what my image looks like after two mirrorings:
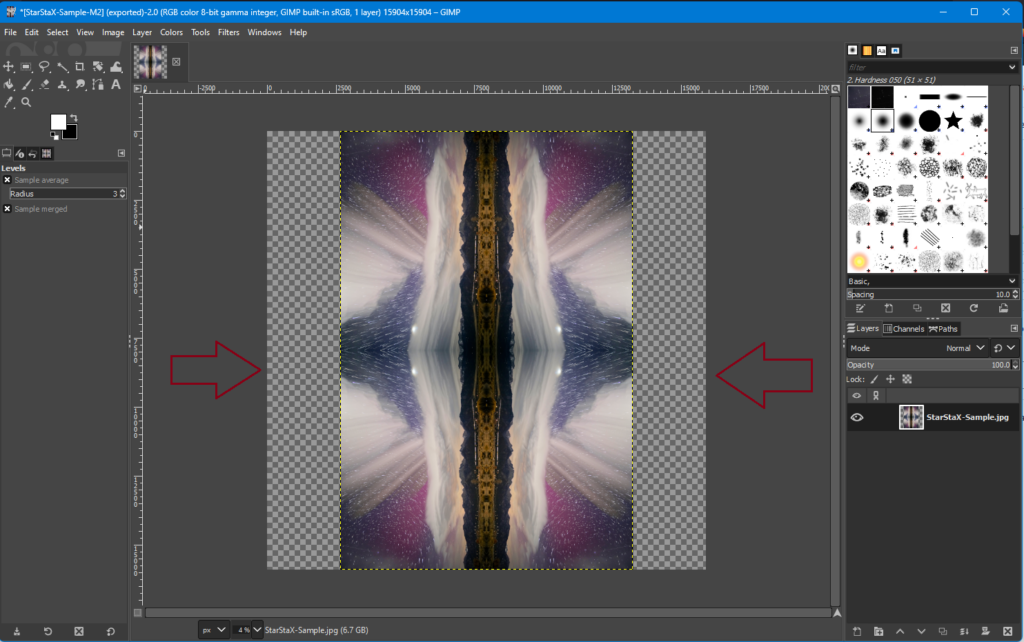
Step 11: Image -> Transform -> Rotate 90 clockwise. Now do Image -> Canvas Size and change the smaller dimension to be the same as the larger one, in this case I change Width to be 15904 to match Height. IMPORTANT: Click the Center button before clicking Resize.
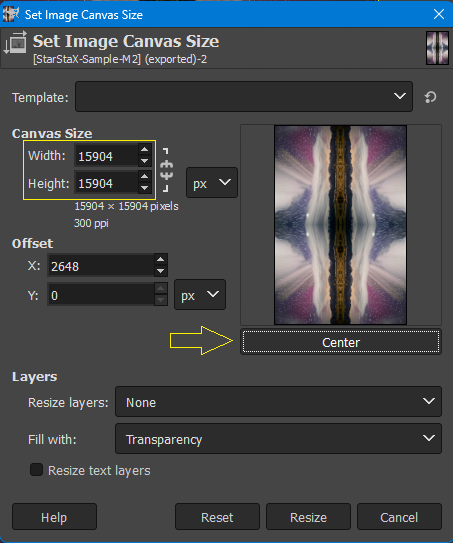
Notice the blank spaces this has created on either side. We’re going to turn those spaces black in the next step:
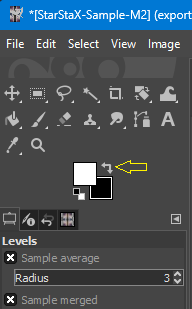
Step 12: In the toolbar on the left side locate the palette that is a black and white square overlapping. Click the little arrows to swap positions so that the foreground square is white and background square is black.
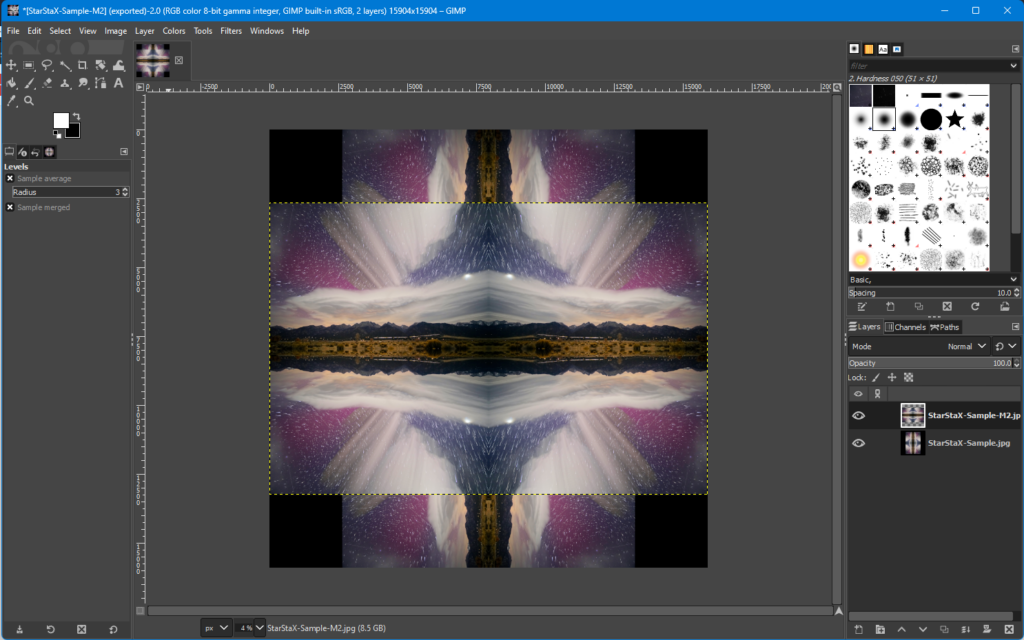
Now do Image -> Flatten Image and you’ll see the blank space on either side of the image turn black.
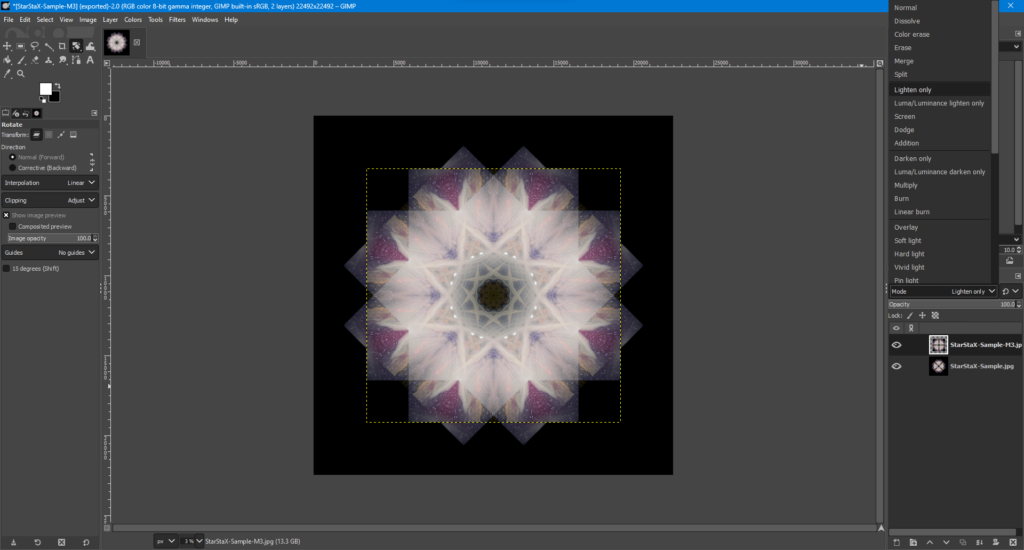
Step 13: Do File -> Open as layers… and select the last image you exported. Your project now looks like this:
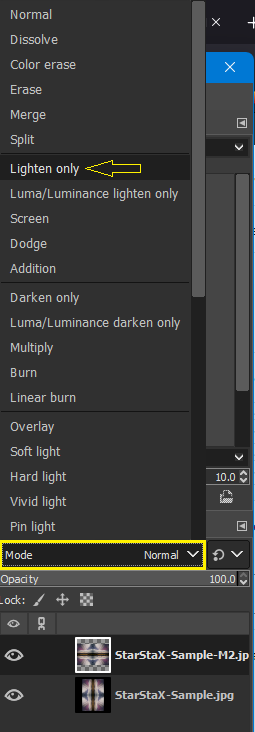
Step 14: On the right side is a box that shows the open layers. The one you just opened is selected. From the Mode pop-up choose “Lighten only”.
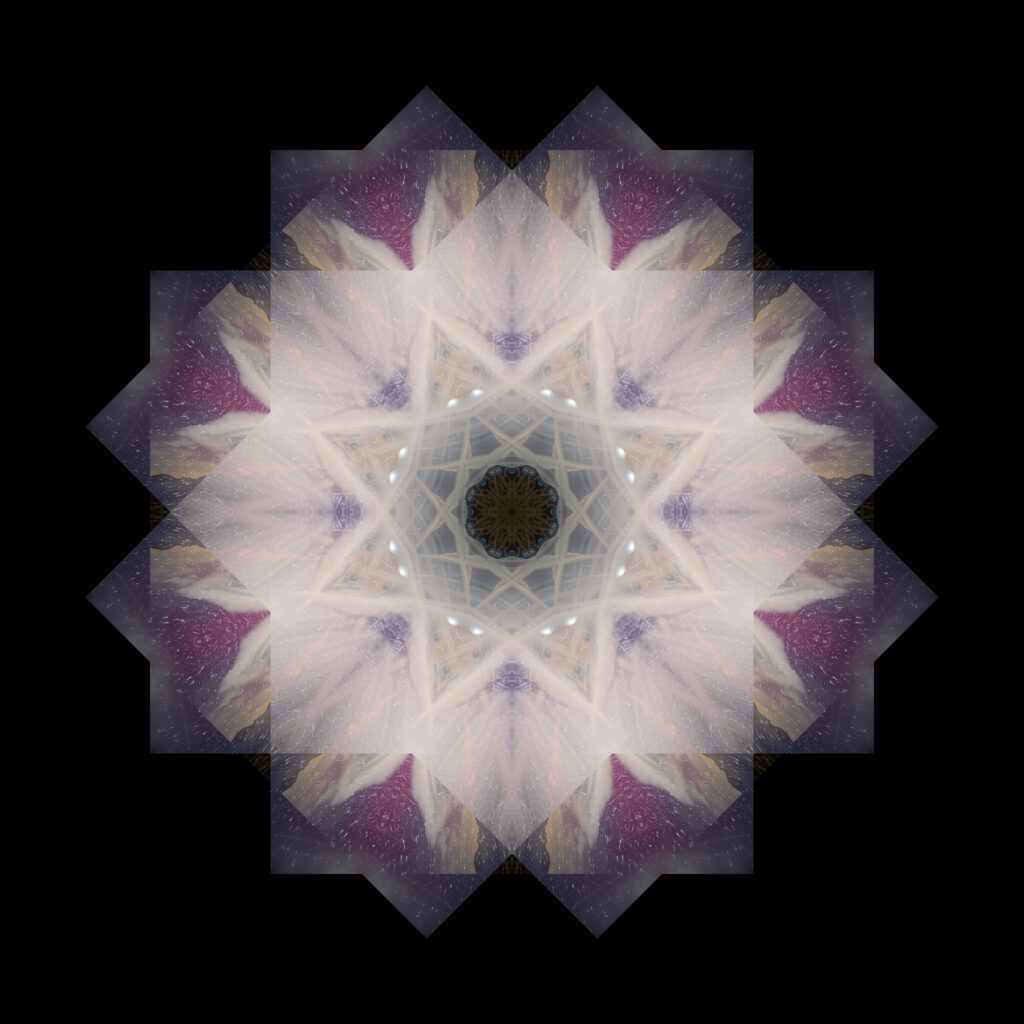
Do Image -> Flatten Image and then File -> Export as… and give it a new name. You now have your first stack and it will look like this:
Step 15: Do Image -> Transform -> Arbitrary rotation and enter angle 45 and click Rotate. Your image will have blank space around it after this completes. Do another Image -> Flatten Image. Zoom view out to see the entire thing. Do File -> Open as layers… and select the last image you exported. Change the Layer mode to Lighten Only (you can also experiment with Overlay mode instead at this point).
Do another Image -> Flatten Image and File -> Export as… You now have your second stack.
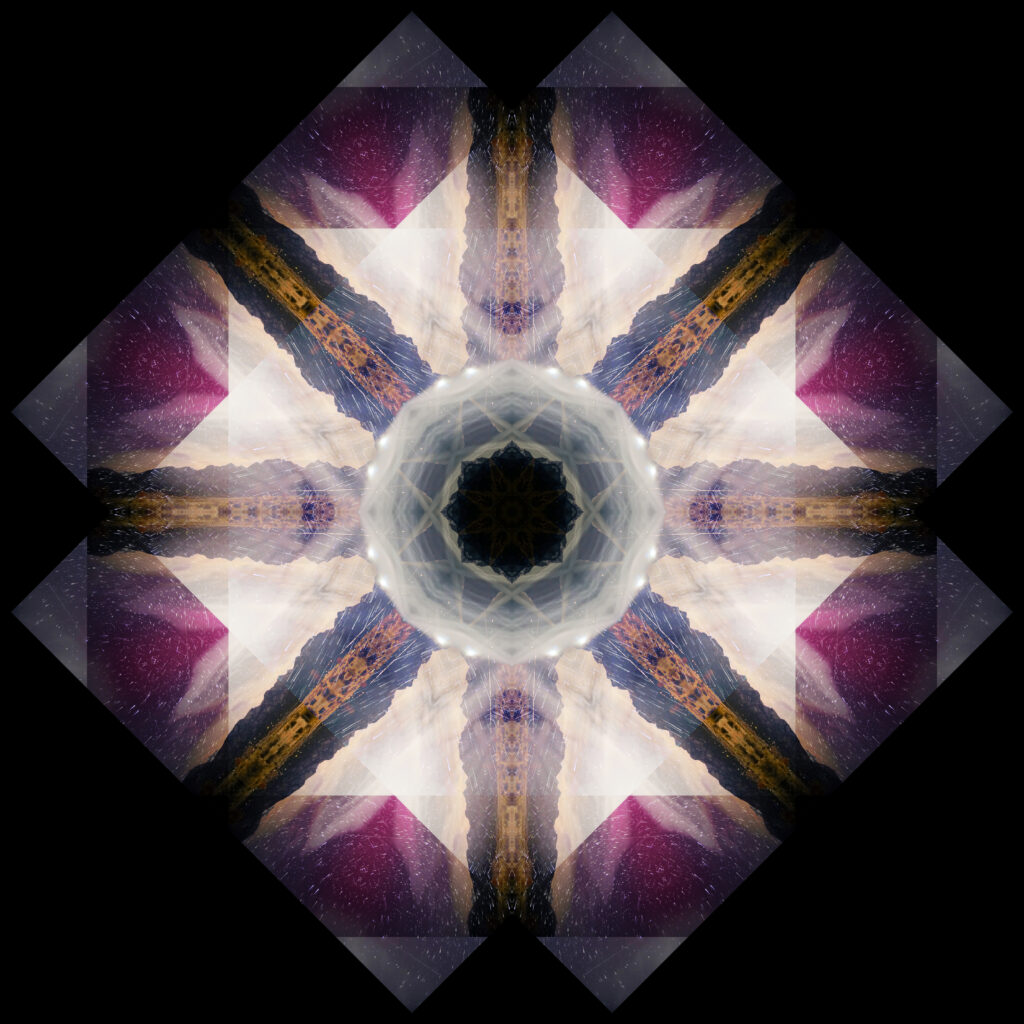
From this point on you can do additional rotations, exports, open as layers. I often rotate 22.5 degrees, import last one, flatten and export. Then to keep it symmetrical I flip vertically and open as layers for the last one. However you can often achieve a pleasing effect by deliberately breaking symmetry. You may also want to experiment with alternate layer modes. Try mirroring along a different dimension than the first one, and then stack those in. There’s a lot of fun to be had experimenting.
One caution: you will be creating very large images. For posting to social media I typically crop if needed and then Image -> Scale Image to resize to 30%.
This is absolutely the coolest thing ever! Thanks so much for sharing this… what an incredible skill/concept!! I can’t wait to create- thanks for sparking some new ideas!!
I appreciate the time and effort you put into creating this tutorial. I am going to have so much fun with this!